
Picking up my series about the eZ80, “I don’t like Windows.” and “Why do you want to do/know that?” again, I decided to see if I could get the ZDS II running on Linux. This actually turned out to be rather easy, with the right hardware…
Installing ZDS II under Wine
Since ZDS II is only available for Windows, we need a way to let it run on Linux. Luckily this is rather easy using Wine. I’m not going to discuss installing Wine on Linux since there are probably small differences between the various Linux distro’s.
In the majority of cases, Wine is directly available from the package manager of your Linux distro of choice. Preferably install a stable version of Wine (not one from a development branch). In my case, on Manjaro Linux, this is version 8.0.1.
Once Wine is installed, ZDS II can be installed. You can download ZDS II here: Zilog Software Download page. The most recent version (at the time of writing this) is 5.3.5. After accepting the Software License, a zip file is downloaded (zds2_eZ80Acclaim!_5.3.5_23020901.zip in case of version 5.3.5). After unzipping the downloaded file, you’ll get an .exe file which is the installer for ZDS II.
Right clicking the .exe file gave me the option to let Wine install ZDS II:

After installing, ZDS II appears in the Wine sub menu:

From here on, we can start up ZDS II without any problems and we can start developing code and test it out with the simulator. In the project settings, in the Debugger panel, select Simulator as the Debug Tool:

The project will be recompiled for you since the project settings has changed:

Now, we can simply put a breakpoint in our code and then hit the Go icon (or F5). The eZ80 code we just generated with the compiler will now run in the simulator and stop at our breakpoint. After that we can examine the content of e.g. the registers, memory, etc. just as if we would run the eZ80 code on the actual hardware. This confirms that the eZ80 toolchain and simulator runs equally well under Wine/Linux as under Windows:

Running the code on actual hardware
Running code inside a simulator is nice but nothing beats running your code on actual hardware. For this we need a means to download the code on our development board. Zilog offers their Acclaim! Smart Cable which is using USB. And herein lays the problem. The USB driver, needed by ZDS II, to communicate with the CPU can’t be installed under Wine (at least I couldn’t find a way to get this working and everyone on the interwebs stumbled into the same problem).
Luckily, there is another way to get our code on the CPU. Zilog also has/had other Smart Cable’s (not clear of they’re still in production). One was a cable using the serial port of your PC. The other one is using ethernet. You can see them appearing in the pop-up menu when you set the desired Debugging Tool for your project:
My gamble was that both the Serial and Ethernet solution would not require any special drivers to be installed under Wine. So I decided to explore this solution. I couldn’t find any Serial Smart Cables to buy (which probably would be very slow as well) but I could find the Ethernet Smart Cable at Digikey. So, I ordered one, waited a few days for it to arrive and then test it out.

Setting up the Ethernet Smart Cable
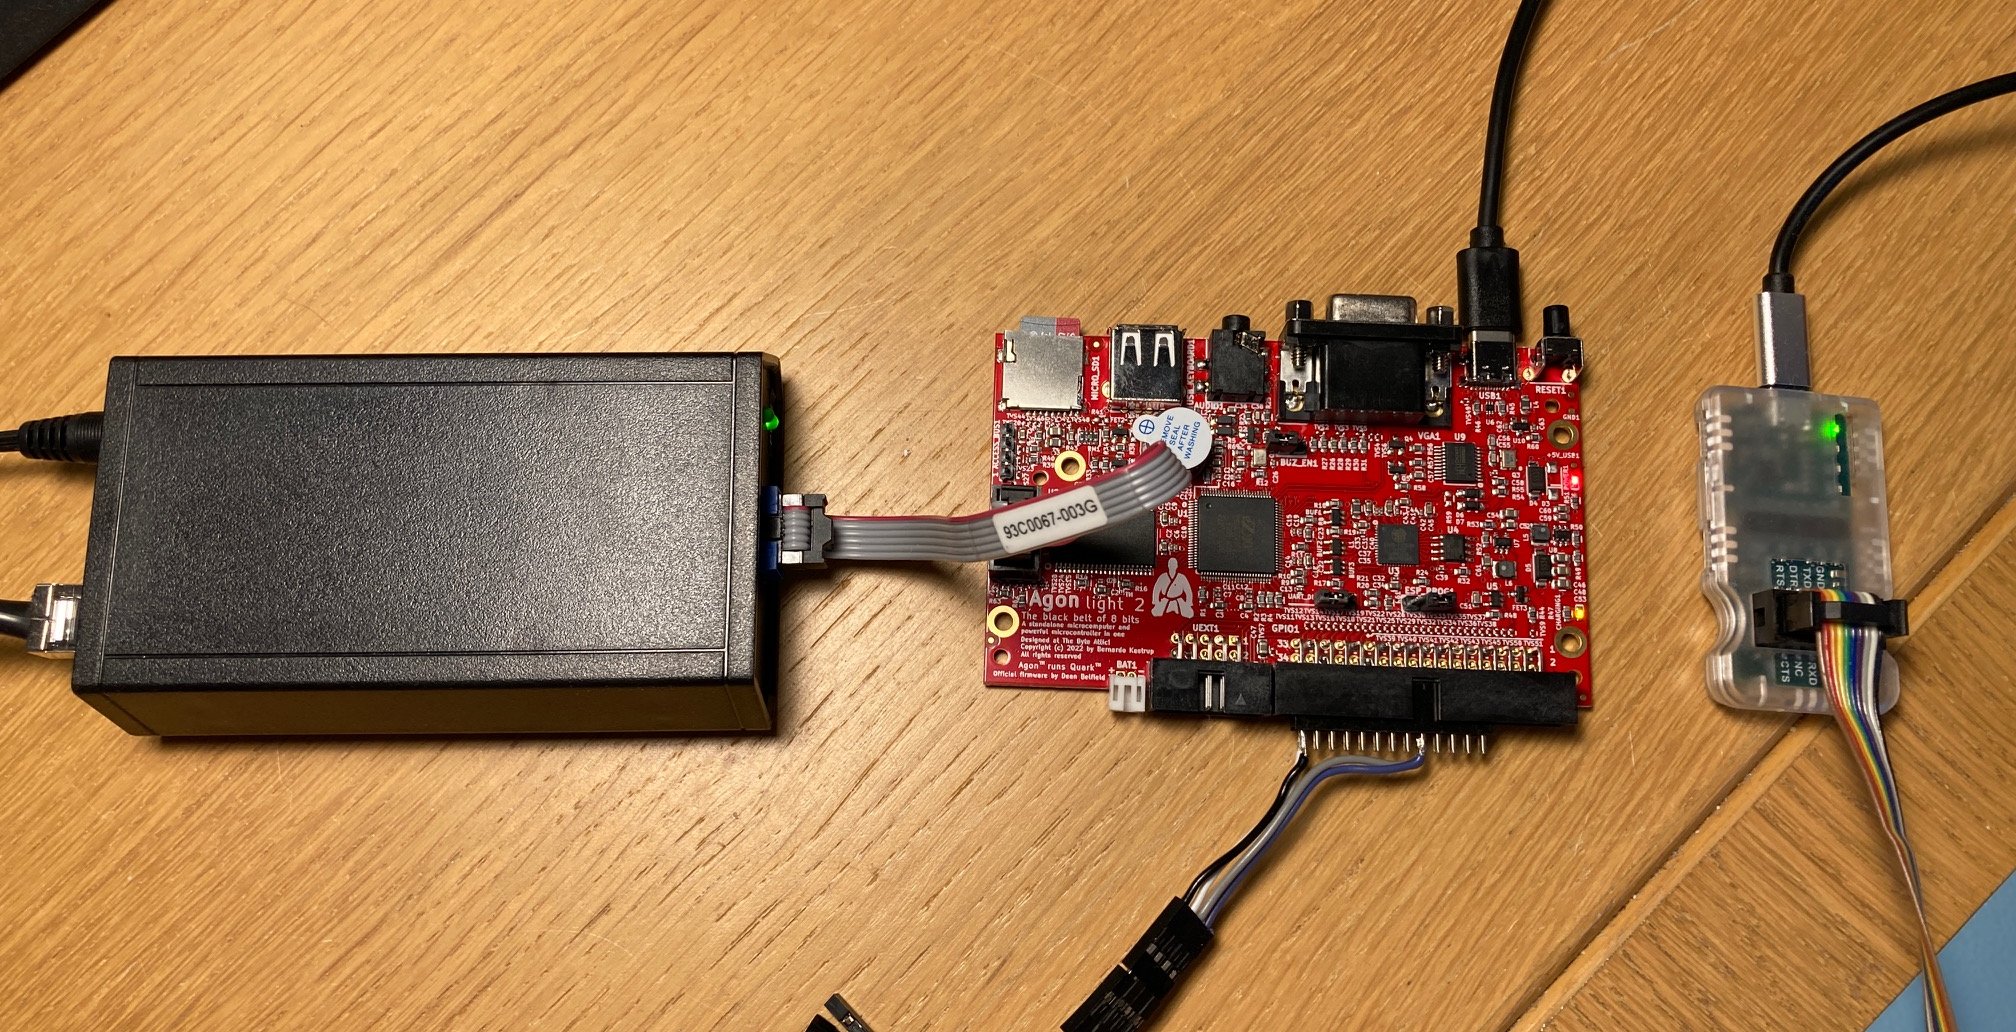
Setting this up was quite easy. I have a few ethernet switches in my man-cave and I decided to plug in the Ethernet Smart Cable in one of the switches. This required a straight ethernet cable. If you prefer to plug in the Ethernet Smart Cable directly into the ethernet port of your PC, then you will need to use a patch cable. Both cables are provided with the Ethernet Smart Cable package.
Once plugged into my network, I needed to find its IP address. For this I used the arp-scan tool. You might need to install this tool via your package manager or, if not available for your Linux distro, find another solution to figure out the IP address of the Ethernet Smart Cable in your setup.
Using arp-scan --local from the command line gave me this output:

We quickly see that the Ethernet Smart Cable got IP address: 192.168.0.247. We can now enter this IP address in a browser and we’re greeted with this web page:
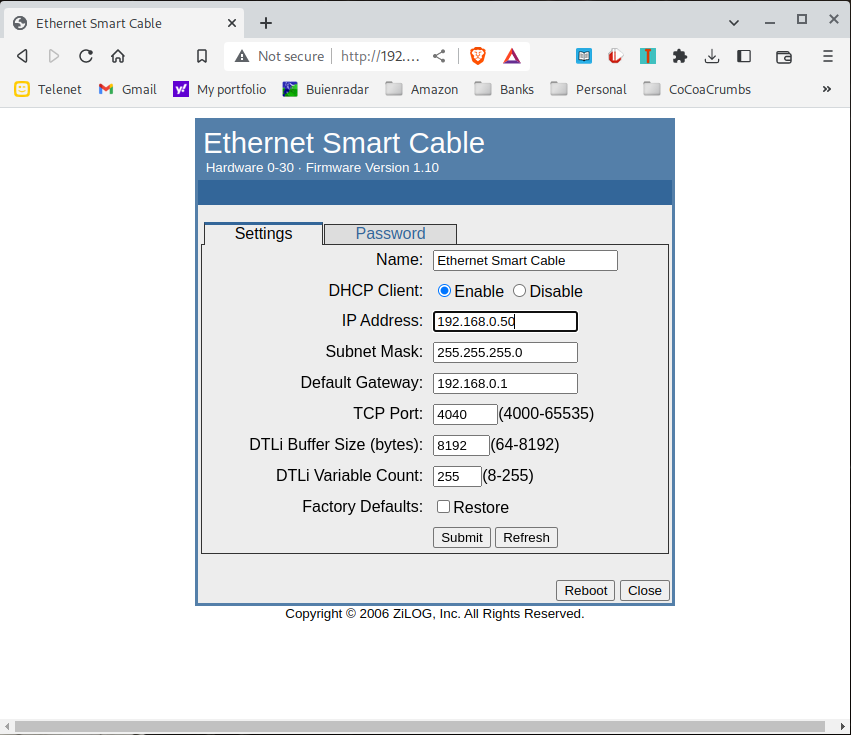
This confirms that the Ethernet Smart Cable appears to be working. I decided to leave DHCP Client enabled. The Ethernet Smart Cable then gets its IP Address assigned instead of setting an IP address itself. In this scenario, there is some risk that its IP address will change over time and that it doesn’t seem to be working anymore because ZDS II is not using the correct IP address. I’ll see if this happens too often in the future. If so, I can still fix the IP address via this web interface.
Now, we need to configure ZDS II to use the Ethernet Smart Cable. After opening the project we’re working on, open Project, select Settings and then select the Debugging pane. In this pane, select EthernetSmartCable as the Debugging Tool:
Next, click on the Setup button that appears next to the pop-up menu. Make sure your Ethernet Smart Cable is powered and plugged into your network. After you clicked on the refresh button, you should see a list of available Smart Cables on your network. Obviously, there is only one Smart Cable available for me at, not surprisingly, IP address 192.168.0.247. Tick the check box next to it to indicate you want to use this Smart Cable:

After this you can close the Setup dialog.
After a rebuild you can now upload/flash the code by clicking the Download Code icon:


You can now run and debug your code on the actual hardware itself, just as if you’re using the USB Smart Cable but now on Linux. No Windows needed anymore!